Relieve back pain fast with these 8 simple yoga poses! Just 15 minutes a day can ease tension, improve flexibility, and support a healthier spine.
Back pain affects 80% of working adults, and you’re probably one of them. The pain might range from a dull ache to sharp discomfort, but the right yoga poses can transform your daily comfort levels.
Yoga’s 5,000-year history shows it works for both quick and lasting back pain relief through gentle, well-arranged poses. Your muscles become stronger, posture improves, and spine flexibility increases with just a few minutes of daily practice.
The sort of thing I love about yoga led me to create these 8 simple poses you can do in 15 minutes. My experience with over 100 yoga variations helped me pick poses that work especially when you have back pain – they’re perfect for both complete beginners and those familiar with yoga.
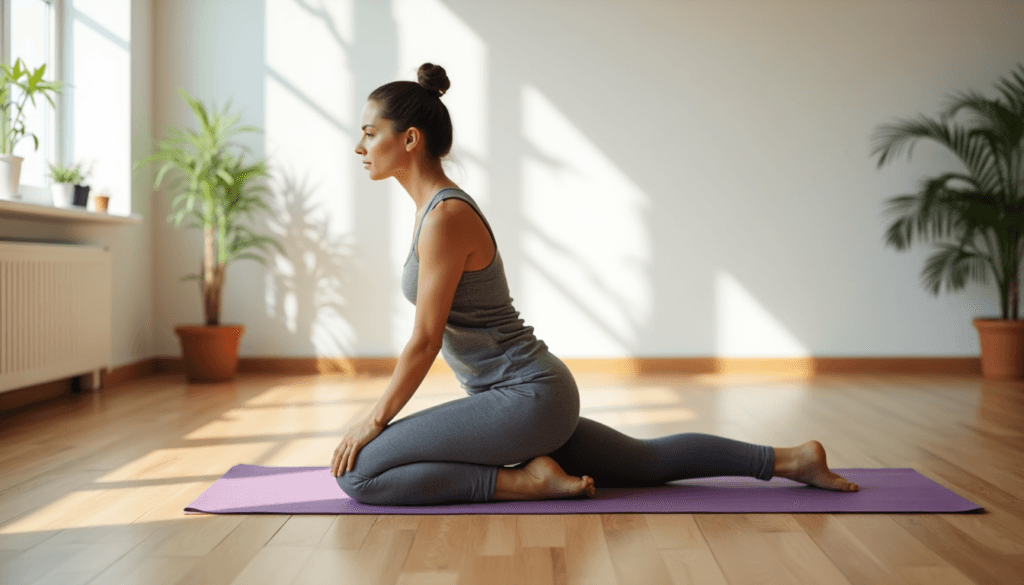
Child’s Pose (Balasana): The Ultimate Back Pain Reliever

Image Source: YouTube
Child’s pose is one of the best yoga positions to get immediate back pain relief. This restorative pose triggers your body’s natural relaxation response and gently stretches important muscle groups.
Proper Child’s Pose Form and Alignment
Start by kneeling on your mat with your big toes touching and knees hip-width apart. Let your torso lower between your thighs and extend your arms forward with palms facing down. Rest your forehead on the mat while keeping your neck neutral.
Benefits for Back Pain Relief
Back pain sufferers get multiple therapeutic benefits from Child’s pose. A 2017 study showed that practicing this pose for just five minutes daily improved cardiovascular measures, resulting in lower blood pressure and reduced resting heart rates. The pose stretches your lower back muscles, hips, and thighs while it lengthens your spine.
The pose gets more blood flowing through your back muscles, which helps reduce tension and promotes healing. It creates space between vertebrae and gives relief to compressed spinal disks.
Common Mistakes to Avoid
- Tucking the chin instead of keeping a neutral neck position
- Lifting the buttocks away from the heels during the pose
- Forcing the forehead to touch the ground when flexibility is limited
- Performing the pose right after meals
Modifications for Beginners
Yoga beginners or people with limited flexibility can try several modifications to make this pose more available. Put a folded blanket between your buttocks and heels to reduce hip strain. You can also rest your forehead on stacked fists or a yoga block if touching the floor is difficult.
People with shoulder discomfort can keep their arms alongside their body with palms facing up instead of extending them forward. Those with sensitive knees can place a rolled towel behind their knees for extra space and support.
Cat-Cow Flow: Dynamic Spinal Movement

Image Source: Tummee
Cat and Cow poses create one of yoga’s most powerful sequences to improve spinal health. This combination of gentle yet powerful movements switches between spinal flexion and extension and gives quick relief from back discomfort.
Step-by-Step Cat-Cow Instructions
- Start in a tabletop position with wrists directly under shoulders and knees under hips
- Point fingertips forward, keeping shins and knees hip-width apart
- Start Cow pose: Inhale while dropping belly toward mat, lifting chest and gaze upward
- Start Cat pose: Exhale while drawing belly to spine, rounding back toward ceiling
- Keep weight evenly distributed between hands and knees throughout the flow
Your shoulders should stay relaxed and away from ears during the sequence. Your neck should line up with spine movement, and you should avoid any forceful motions.
Breathing Techniques During Flow
Cat-Cow’s effectiveness comes from matching breath with movement. Each position has its own breath pattern:
- Cow Pose (Bitilasana): Inhale deeply while arching back, creating spinal extension
- Cat Pose (Marjaryasana): Exhale completely while rounding spine and engaging core muscles
In spite of that, your movements should stay smooth and controlled to match your natural breath rhythm. Breath and movement working together help boost mindfulness and body awareness.
Target Areas and Benefits
This dynamic sequence provides detailed benefits to spinal health. The alternating movements help improve flexibility along the entire length of the back. Gentle flexion and extension of the spine helps proper disk hydration and nourishment.
The pose sequence also:
- Gets your abdominal organs moving and massaged
- Makes your posture better by strengthening spine-supporting muscles
- Releases tension from your neck and upper back
- Boosts blood flow throughout your spinal column
Practice this sequence for 5-20 breath cycles [link_2] to get the best results. Without doubt, regular practice helps you develop better postural awareness and spinal mobility. The gentle compression and release of abdominal areas helps digestion and promotes overall spine health.
Cobra Pose (Bhujangasana): Strengthen Your Spine

Image Source: Yogajala
Cobra pose, or Bhujangasana in Sanskrit, is a basic backbend that builds spine strength and helps relieve back pain. You’ll get better results when you understand how this pose works.
Correct Cobra Pose Alignment
Start by lying face down on your mat. Put your palms flat beside your middle ribs and keep your elbows close to your body. Your pubic bone should lightly touch the floor while your legs stay active but not tense.
These points are the foundations of good alignment:
- Press the tops of your feet firmly into the mat
- Keep shoulders relaxed and away from ears
- Your core should be tight to protect your lower back
- The backbend should flow evenly through your spine
- Your neck should stay in its natural position
Back Strengthening Benefits
We used multiple muscle groups in Cobra pose to build strength throughout your back. The pose works your erector spinae, trapezius, and rhomboids. It also activates your core muscles, including the rectus abdominis and transverse abdominis, which support your spine.
This pose does more than just strengthen muscles. Regular practice makes your spine more mobile, improves your posture, and helps fight the effects of sitting too long. The gentle compression and extension of spinal disks help improve disk hydration and nourishment.
Safety Tips and Precautions
Your safety depends on several factors. The lower back is usually more flexible than the upper back, so don’t focus the bend only in this area. Try to create an even arch through your spine instead of forcing a deep bend.
You should skip this pose if you have:
- Recent abdominal surgery
- Carpal tunnel syndrome
- Severe back injuries
- Pregnancy
Variations for Different Skill Levels
Beginners should start with a gentle lift, keeping elbows bent while focusing on proper form. You can gradually straighten your arms as you get stronger, but keep your core engaged. The goal is to lengthen your spine rather than lift as high as possible.
Advanced students can try deeper versions by moving their hands slightly forward and lifting higher while maintaining good form. Note that steady breathing is important, and never force the pose beyond your flexibility level.
Bridge Pose (Setu Bandha): Lower Back Relief

Image Source: Yoga Journal
Bridge pose is a versatile backbend that builds strength and promotes restoration. It works well to relieve back pain. The pose targets multiple muscle groups and offers variations for all skill levels.
Bridge Pose Setup
Start by lying on your back. Bend your knees and place your feet flat on the mat at hip-width distance. Your arms should rest beside your body with palms down. Let your fingertips gently touch your heels to find the right position.
To arrange your body properly:
- Keep thighs parallel and toes pointing straight ahead
- Place feet under knees at a 90-degree angle
- Distribute weight evenly between feet
- Press shoulders gently into the mat
Core Engagement Tips
Your core muscles need activation before you lift into the pose. Press your feet firmly into the mat and activate your gluteal muscles. This engagement protects your lower back and helps maintain proper form throughout the movement.
These steps maximize muscle activation:
- Draw your navel toward your spine
- Tighten your buttocks and thighs
- Press your feet and arms into the floor
- Gradually lift your tailbone upward
- Roll your shoulders underneath to create space in your upper back
Therapeutic Benefits
Bridge pose affects multiple body systems and provides complete relief for back pain sufferers. Studies show regular practice helps improve spinal mobility and fights the effects of sitting too long.
The pose offers these therapeutic benefits:
- Stretches chest, neck, and spine
- Strengthens back, glutes, and hamstrings
- Improves posture and reduces kyphosis
- Improves breathing capacity
- Relieves lower back stiffness
Props can increase the benefits. A yoga block under your sacrum provides gentle support and creates a more restorative experience. This change helps people with sensitive backs or beginners who are building strength.
The pose helps reduce stress and manage anxiety through gentle abdominal compression. You should avoid this pose if you have neck injuries, high blood pressure, or are in late-stage pregnancy.
Downward-Facing Dog (Adho Mukha Svanasana)

Image Source: Haritha Yogshala
Downward-Facing Dog, or Adho Mukha Svanasana, stands out as a core yoga pose that builds strength and flexibility to relieve back pain completely. This inverted V-shaped position helps you feel better right away and keeps your spine healthy over time.
Proper Form and Alignment
Your journey starts on hands and knees in a tabletop position. Make sure your wrists line up under shoulders and knees under hips. Press your palms firmly into the mat with fingers spread wide. Your index fingers should point forward at 12 o’clock. We focused on these points to line up correctly:
- Keep arms straight with a slight bend in elbows
- Place feet hip-width apart
- Pull shoulder blades down away from ears
- Keep spine long from tailbone to crown
- Press heels toward mat without forcing
Many people want to get their heels to the ground, but that’s not needed to line up correctly. The key is lifting your hips up and back while keeping a long spine.
Spinal Elongation Benefits
This pose works on several areas of your spine and helps people with back pain feel better. Regular practice guides you toward:
- Better spinal mobility and flexibility
- More blood flow throughout the back
- Stronger core and upper body muscles
- Improved posture with less spinal compression
The most important benefit comes from the pose’s way to reverse sitting all day. It decompresses your spine and creates space between vertebrae.
Common Mistakes to Avoid
Some mistakes can reduce the pose’s benefits or cause pain. Don’t round your back – this throws off your spine’s alignment. Also, place your hands correctly. The core team often sees people putting weight in their hands wrong, which hurts their wrists.
These alignment issues come up often:
- Shoulders dropping toward ears
- Pushing heels down too hard
- Keeping legs too straight when tight
- Wrong weight balance between hands and feet
Note that everyone’s body works differently. Most people in the West don’t get into a “perfect” downward dog with straight legs and heels down. You should find a position that lengthens your spine while feeling stable and comfortable.
Seated Forward Bend (Paschimottanasana)

Image Source: Yoga Journal
After dynamic poses, the Paschimottanasana or Seated Forward Bend gives you a gentle yet effective stretch for your back body. This classic pose, the fifth of the 12 basic postures of hatha yoga, provides detailed relief for back discomfort.
Step-by-Step Instructions
Start in Dandasana (Staff Pose) with your legs extended. Press your sitting bones firmly into the floor while drawing your lower belly in and up. Here are the essential alignment points:
- Lengthen your spine on an inhale
- Fold forward from the hips on an exhale
- Keep length in the front body
- Let arms slide along the floor
- Maintain spine length while hinging from hips
We focused on moving from your belly through the ribcage, then chest, and finally forehead toward your legs. Don’t force yourself deeper than possible with a straight back.
Back Stretching Benefits
This pose offers multiple therapeutic advantages for back health:
- Stretches entire posterior chain from heels to neck
- Stimulates internal organs and digestive system
- Improves spinal mobility and flexibility
- Releases tension in back muscles
- Energizes central nervous system
Modifications for Tight Hamstrings
Flexibility varies among practitioners, and several adaptations make this pose available. Of course, sitting on props helps maintain proper alignment. A folded blanket or block under your hips makes forward tilting of the pelvis easier.
If you have tight hamstrings:
- Bend knees as needed to maintain spine length
- Use a strap around feet for better reach
- Position feet hip-width apart for more space
Right now, many practitioners aim to touch their toes, but this isn’t the goal. You’ll find that maintaining a long spine while hinging from the hips gives more therapeutic benefit than forcing a deep fold.
Note that you should avoid this pose with lower back injuries or right after meals. Focus on creating length in your spine rather than achieving maximum forward fold.
Thread the Needle Pose

Image Source: Hinge Health
Thread the Needle pose ranks among the best poses to relieve upper back tension. This gentle twisting motion helps beginners and targets the thoracic spine. You’ll feel a therapeutic stretch in your shoulders and neck.
Proper Alignment
Start in a tabletop position. Place your wrists right under your shoulders and line up your knees with your hips. Here’s how to do it properly:
- Take your right arm and thread it under your left arm as you slide it along the mat
- Let your right shoulder and the side of your head rest on the ground
- Press your left arm firmly into the mat
- Keep your hips stacked above your knees
- Let your chest rotate gently toward the ceiling
We need to keep our core engaged to protect the lower back. Remember to breathe steadily as you hold this stretch.
Upper Back Relief Benefits
This pose works wonders for your deltoids, especially the rear ones, and creates space between your shoulder blades. Regular practice gives you these benefits:
- Better posture through opened chest and shoulders
- Less tension between shoulder blades
- More mobility in your thoracic spine
- Less stress and more relaxation
The most important benefit comes from the length it creates between vertebrae, which helps relieve compressed spinal segments.
Safety Considerations
Though gentle, you need to be careful with this pose. Skip it if you have:
- Recent or ongoing knee injuries
- Unstable shoulders
- Neck problems
- Degenerative disk disease
You can modify the pose to make it safer and more comfortable. Try placing a block under your shoulder and head until you become more flexible. You might also want to lower your hips onto your heels to ease lower body strain while still getting a good upper body stretch.
The twist should feel comfortable – never force it. Listen to your body’s limits and adjust as needed. Take your time with this pose and focus on lining everything up correctly rather than trying to twist as far as possible.
Supine Twist (Jathara Parivartanasana)

Image Source: Gaia
The supine twist is a gentle yet powerful pose that combines relaxation with therapeutic benefits for your spine. Your body uses gravity to assist the twist when you recline, which makes it work especially well if you have back pain.
Correct Twisting Technique
Start by lying on your back with your arms spread at shoulder height and palms facing up. You need to pay attention to these arrangement points:
- Pull your right knee to chest while your shoulder blades stay settled
- Guide the right knee across your body as you exhale
- Rest your left hand on the right knee
- Keep both shoulders pressed into the mat
- Look toward your extended right arm
Take deep breaths – each inhale creates length while each exhale deepens the twist. The movement becomes a moving meditation that promotes physical and mental relaxation.
Spinal Mobility Benefits
This pose does more than just stretch your muscles. You’ll notice better flexibility throughout your back after practicing. The gentle rotation creates space in your spine, which leads to:
- Better blood flow in spinal muscles
- More flexibility in back, shoulders, and hips
- Less tension in your lower back
- Better balanced sacroiliac joints
The pose’s biggest advantage is its ability to create space between vertebrae. This helps hydrate spinal disks and nourish surrounding tissues. The combination of active participation and passive release makes it particularly good for chronic back tension.
Variations for Different Needs
Everyone’s body responds differently to twists, so several modifications make this pose available to all. Beginners might find more stability by keeping both knees bent. As you become more flexible, try these progressive variations:
- Simple Variation: Both knees bent, moving together
- Intermediate: One leg extended while other knee crosses body
- Advanced: Both legs straight, moving together in the twist
People with sensitive backs can place a cushion under the bent knee for support. Hold the pose anywhere from 5-10 breaths for beginners to 10-30 seconds for advanced practitioners.
Draw your shoulder blades down toward the mat while moving your legs’ weight toward the floor to improve the therapeutic benefits. This active engagement creates space in your lower back and provides quick relief from compression.
Comparison Table
| Pose Name | Primary Benefits | Key Alignment Points | Target Areas | Common Mistakes/Contraindications | Recommended Modifications |
|---|---|---|---|---|---|
| Child’s Pose (Balasana) | – Quick back pain relief – Better blood circulation – Lower blood pressure | – Big toes touch – Knees line up with hips – Forehead rests on mat – Neutral neck position | – Lower back – Hips – Thighs | – Tucking chin – Lifting buttocks from heels – Pushing forehead to ground | – Folded blanket between buttocks and heels – Rest forehead on stacked fists – Arms rest beside body |
| Cat-Cow Flow | – Improves spinal flexibility – Improves disk hydration – Helps maintain good posture | – Wrists under shoulders – Knees under hips – Breath flows with movement | – Full spine – Abdominal organs – Neck and upper back | Not mentioned | Practice for 5-20 breath cycles |
| Cobra Pose | – Builds spine strength – Improves posture – Improves spinal mobility | – Palms beside middle ribs – Elbows close to body – Shoulders move away from ears | – Erector spinae – Trapezius – Rhomboids | – Focusing bend in lower back – Pushing too deep | – Begin with gentle lift – Keep elbows bent for beginners |
| Bridge Pose | – Better spinal mobility – Reduces kyphosis – Improves breathing capacity | – Knees bent – Feet stay flat and parallel – Shoulders press into mat | – Back – Glutes – Hamstrings | Avoid with: – Neck injuries – High blood pressure – Late pregnancy | – Block under sacrum – Gentle supported variation |
| Downward-Facing Dog | – Relieves spinal pressure – Improves blood flow – Better posture | – Hands shoulder-width – Feet hip-width – Shoulders move from ears | – Full spine – Core – Upper body | – Rounding back – Dropping shoulders – Forcing heels down | – Bend knees as needed – Keep slight elbow bend |
| Seated Forward Bend | – Stretches back muscles – Better spinal mobility – Releases tension | – Lengthen spine – Move from hips – Keep back straight | – Back muscles – Hamstrings – Central nervous system | – Pushing too deep – Rounding spine | – Sit on folded blanket – Use strap around feet – Bend knees |
| Thread the Needle | – Relieves shoulder tension – Better spinal mobility – Promotes relaxation | – Wrists under shoulders – Hips above knees – Core stays engaged | – Upper back – Shoulders – Thoracic spine | Avoid with: – Knee injuries – Shoulder instability – Neck injuries | – Block under shoulder/head – Lower hips to heels |
| Supine Twist | – Improves flexibility – Better blood flow – Creates spinal space | – Shoulders press down – Steady breathing – Gentle knee movement | – Back – Shoulders – Hips | Not mentioned | – Keep both knees bent – Cushion under bent knee – Adjust time (5-30 seconds) |
Final Words
These eight yoga poses have improved my flexibility and back comfort. Each pose targets different areas of the spine. The complete approach to back pain relief takes just 15 minutes each day.
My routine begins with gentle poses like Child’s Pose. The Cat-Cow Flow follows to warm up the spine safely. Bridge Pose and Cobra build back muscle strength. Forward folds and twists help release stubborn tension. All these poses work together. They provide quick relief and lasting benefits for your spine’s health.
Proper form is essential, but perfect alignment isn’t the goal. Your body knows best, so modify poses when needed. Steady breathing should be your focus during practice. The poses might challenge you at first. Regular practice guides you to better back comfort and mobility.
Teaching yoga has taught me something valuable. Even five minutes of mindful movement can make a big difference in back pain management. The most comfortable poses should be your starting point. You can add more poses as your confidence grows and flexibility improves.
FAQs
Q1. What are some effective yoga poses for relieving back pain? Some effective yoga poses for back pain relief include Child’s Pose, Cat-Cow Flow, Cobra Pose, and Bridge Pose. These poses help stretch and strengthen the back muscles, improve spinal flexibility, and promote proper alignment. However, it’s important to practice with proper form and listen to your body to avoid strain.
Q2. How long should I hold each yoga pose for back pain relief? Generally, hold each pose for 5-10 breaths or about 30 seconds. For restorative poses like Child’s Pose, you can hold for up to 5 minutes. The duration may vary based on your comfort level and experience. Start with shorter holds and gradually increase as you build strength and flexibility.
Q3. Is yoga safe for all types of back pain? While yoga can be beneficial for many types of back pain, it’s not suitable for all conditions. Those with acute injuries, herniated disks, or certain spinal conditions should consult a healthcare professional before starting yoga. Some poses may need to be modified or avoided depending on your specific condition.
Q4. Can beginners practice these yoga poses for back pain? Many of these poses are suitable for beginners, but it’s important to start slowly and focus on proper alignment. Poses like Child’s Pose, Cat-Cow, and Cobra are generally safe for beginners. More advanced poses like Wheel Pose should only be attempted with proper instruction and preparation. Consider taking a beginner’s yoga class or working with a qualified instructor.
Q5. How often should I practice yoga for back pain relief? For best results, aim to practice yoga for back pain relief at least 3-4 times per week. Consistency is key in building strength and flexibility. Even short daily sessions of 10-15 minutes can be beneficial. Listen to your body and adjust the frequency and intensity of your practice as needed.
References
[1] – https://www.webmd.com/fitness-exercise/how-to-do-cobra-pose
[2] – https://worldpeaceyogaschool.com/blog/benefits-of-seated-forward-bend/
[3] – https://www.yogajournal.com/poses/cobra-pose-2/
[4] – https://www.ekhartyoga.com/resources/yoga-poses/seated-forward-bend
[5] – https://www.360-yoga.com/blog/2023/12/13/why-you-have-pain-in-downward-facing-dog-and-how-to-fix-it
[6] – https://beyogi.com/learn-yoga/poses/supine-spinal-twist/
[7] – https://myyogateacher.com/yoga-asana/jathara-parivartanasana
[8] – https://www.familyhealthchiropractic.com/cat-cow-progressions-for-optimal-spine-health/
[9] – https://www.everydayyoga.com/blogs/guides/how-to-do-cat-cow-pose-in-yoga?srsltid=AfmBOoqrsqS2SUBSqni1LJZE0q5soKUGeugxBKf-ng5kUigQLw8wPXq4
[10] – https://www.everydayyoga.com/blogs/guides/how-to-do-cat-cow-pose-in-yoga?srsltid=AfmBOori98HXQtSibS2jw20-Htscs-bchep7LAsBABA19vnmZuf-gcc1
[11] – https://www.heartandbonesyoga.com/resources/yoga-low-back-pain-relief-cobra-pose-without-pain/
[12] – https://www.medicalnewstoday.com/articles/yoga-for-back-pain
[13] – https://yoga15.com/pose/bridge/
[14] – https://cancer.uthscsa.edu/news-and-stories/five-exercises-strengthen-your-pelvic-floor
[15] – https://www.yogajournal.com/poses/bridge-pose/
[16] – https://www.adityabirlacapital.com/abc-of-money/health-benefits-of-setu-bandhasana
[17] – https://insideyoga.org/blog/downward-facing-dog-alignment-are-you-doing-it-wrong/
[18] – https://www.wellandgood.com/downward-dog-mistakes
[19] – https://www.bu.edu/wellness/six-reasons-to-practice-downward-dog/
[20] – https://yogawithsapna.com/downward-facing-dog-exploration-anatomy-and-alignment/
[21] – https://www.yogajournal.com/poses/downward-facing-dog/
[22] – https://www.doyou.com/10-alignment-tips-to-improve-your-downward-dog/
[23] – https://www.maksreznik.com/blog/downward-dog
[24] – https://www.shvasa.com/yoga-blog/how-to-practice-paschimottanasana-seated-forward-fold-steps-benefits-and-contraindications
[25] – https://www.verywellfit.com/seated-forward-bend-paschimottanasana-3567101
[26] – https://liforme.com/blogs/blog/seated-forward-fold-paschimottanasana
[27] – https://yogamindyogabody.com/keep-your-back-safe-in-forward-bends/
[28] – https://bodybyyoga.training/yoga-for-beginners/seated-forward-fold-pose/?srsltid=AfmBOoqZ-HxkS1LERrXHm5ZhmP_qg_Cu0cNZnWn7jNGUQ34nzQXT7-OD
[29] – https://www.hingehealth.com/resources/articles/thread-the-needle/
[30] – https://yoga15.com/pose/thread-the-needle/
[31] – https://www.yogajournal.com/poses/yoga-by-benefit/back-pain/yoga-for-upper-back-pain/
[32] – https://www.everydayyoga.com/blogs/guides/how-to-do-thread-the-needle-pose-in-yoga?srsltid=AfmBOop7qxc7g5j0xz9oA1-gL41q0dyXVBSIljkQdIIeKk7DSR5kgY6X
[33] – https://bodybyyoga.training/yoga-for-beginners/modifications/beginners-modifications-for-thread-the-needle-pose/?srsltid=AfmBOopkHq85Ayk1Nst6Tgvcct7VlXwKZvIwOvJ_yavjmSVoq75zjvF5
[34] – https://www.verywellfit.com/how-to-do-thread-the-needle-techniques-benefits-variations-5090358
[35] – https://www.healthshots.com/fitness/staying-fit/supta-matsyendrasana-or-supine-spinal-twist/
[36] – https://www.yogajournal.com/poses/types/twists/yoga-twists-back-pain/
[37] – https://www.verywellfit.com/supine-spinal-twist-supta-matsyendrasana-3567125
[38] – https://www.doyou.com/5-health-benefits-of-supine-twist/
[39] – https://www.webmd.com/fitness-exercise/how-to-do-childs-pose
[40] – https://bodybyyoga.training/yoga-for-beginners/childs-pose-guide/?srsltid=AfmBOorOx9oJbXpE0jC2F_8qAbhFdyVDANI6wNCUXX-qYETblNrvqGrE
[41] – https://health.clevelandclinic.org/childs-pose
[42] – https://www.verywellhealth.com/yoga-for-back-pain-childs-pose-297337
[43] – https://www.timesnownews.com/health/article/watch-out-for-these-common-mistakes-while-performing-balasana-or-the-child-s-pose/657694
[44] – https://www.ekhartyoga.com/articles/practice/how-to-modify-childs-pose-balasana
[45] – https://www.orthoindy.com/cat-cow
[46] – https://www.healthshots.com/fitness/staying-fit/cat-cow-pose-or-marjariasana-health-benefits/
Blexza Blog | Global Fusion Blog | Urdu Global Fusion Blog | TrendNovaWorld Blog

With 16 a long time of involvement, Alex Carter is a prepared essayist specializing in different specialty subjects, counting wellbeing, fund, innovation, way of life, and more. Her substance is profoundly investigated, SEO-optimized, and supported by sound sources, guaranteeing per users pick up precise, quick, and locks in data over numerous domains.
📌 Mastery: In-Depth Investigate | SEO Substance | Multi-Niche Writing